Electronic shutter vs Mechanical shutter.

fuji x-t1 manual shutter displaying movement

Hi,

just a quick one as i am sure a lot of you are more experienced with this than myself. 

Whilst traveling to work i was taking some pictures on the flight. To avoid the cabin crew scowl i turned the Fuji X-T1's shutter from Mechanical to electronic. 

It is permanently set on the Mechanic mode, as in the past, i accidentally put it onto electronic and it would not fire the off camera flashes. To prevent that happening again, it is a setting i do not change. 

This occasion due to the silence of the electronic shutter, it would be a perfect solution.

Just for a demonstration and comparison, as i didn't want to take pictures of the planes propellers.

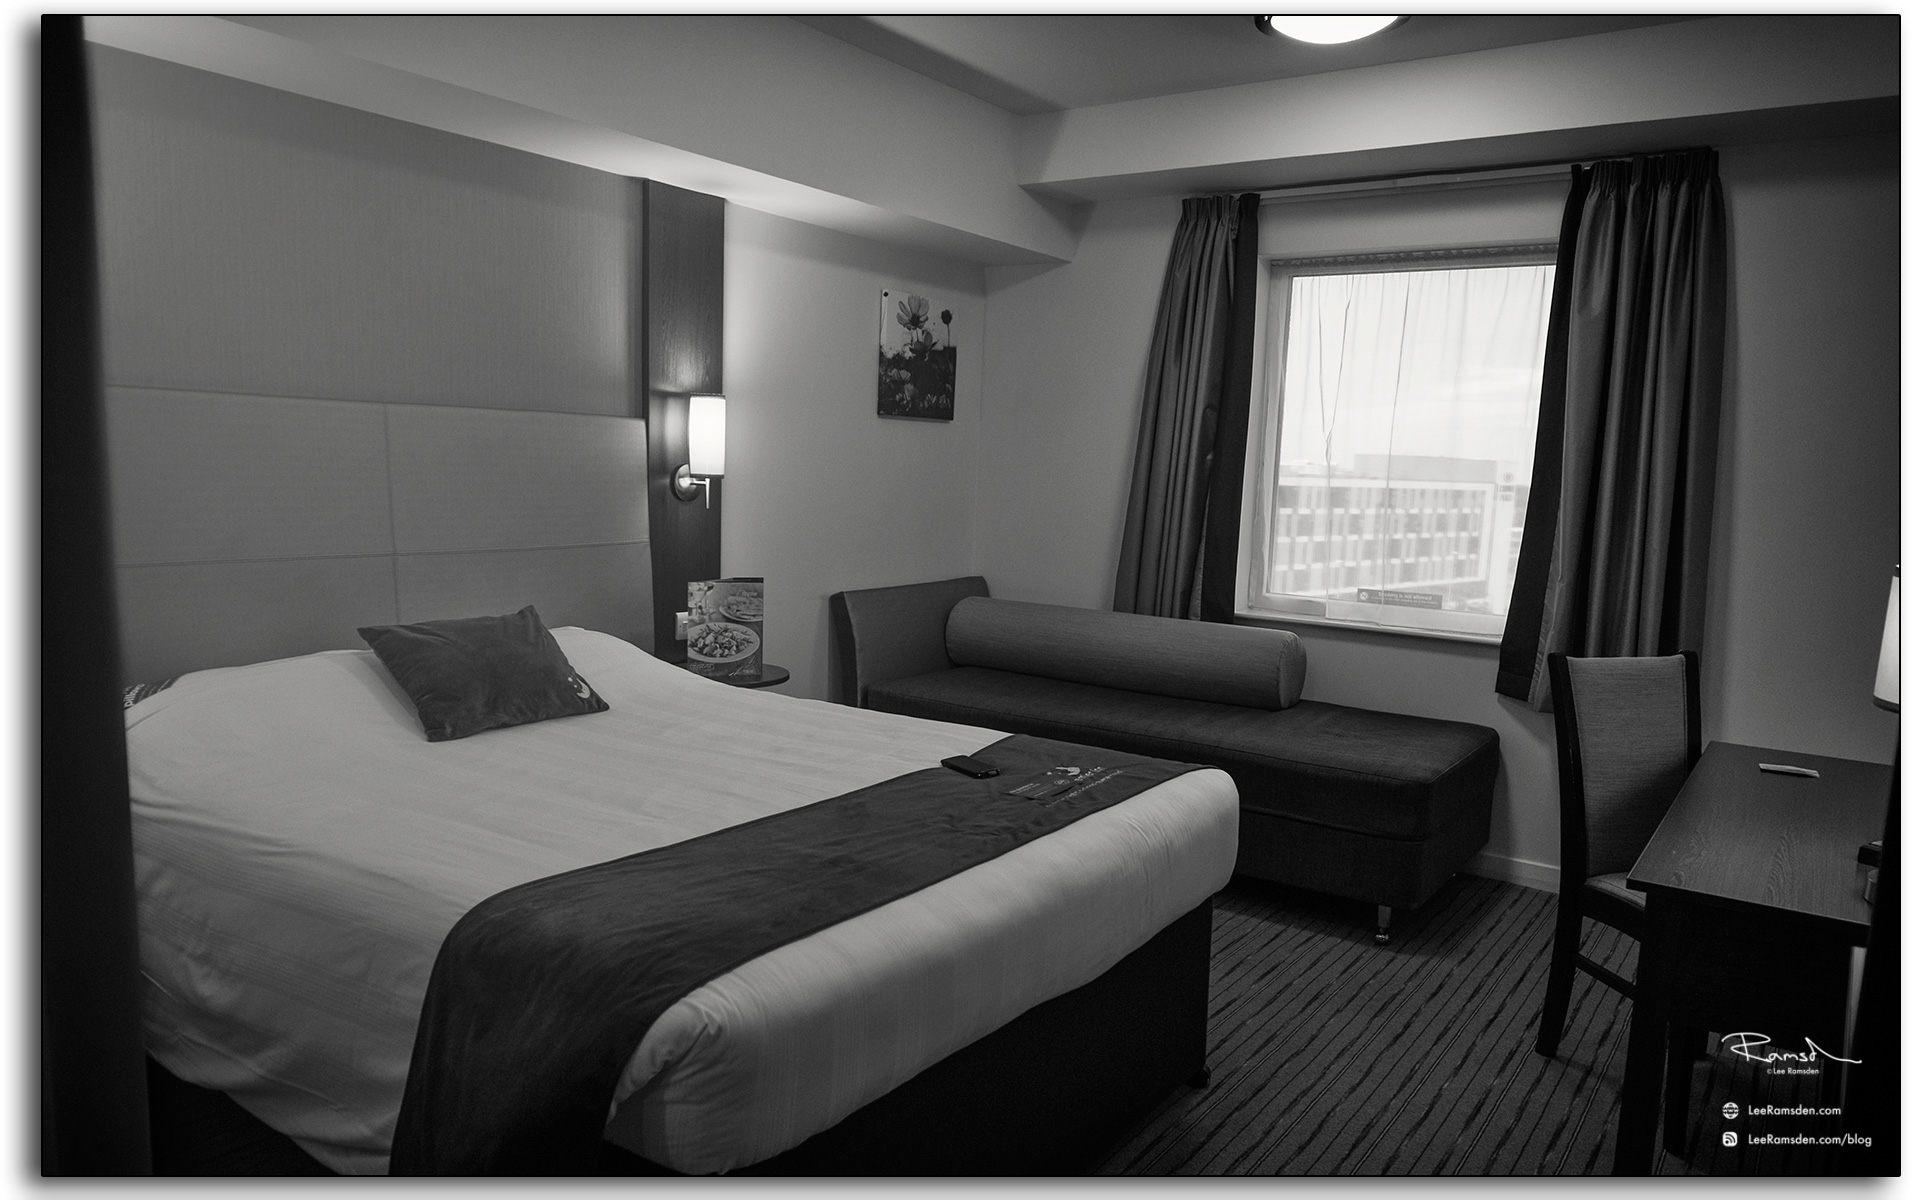
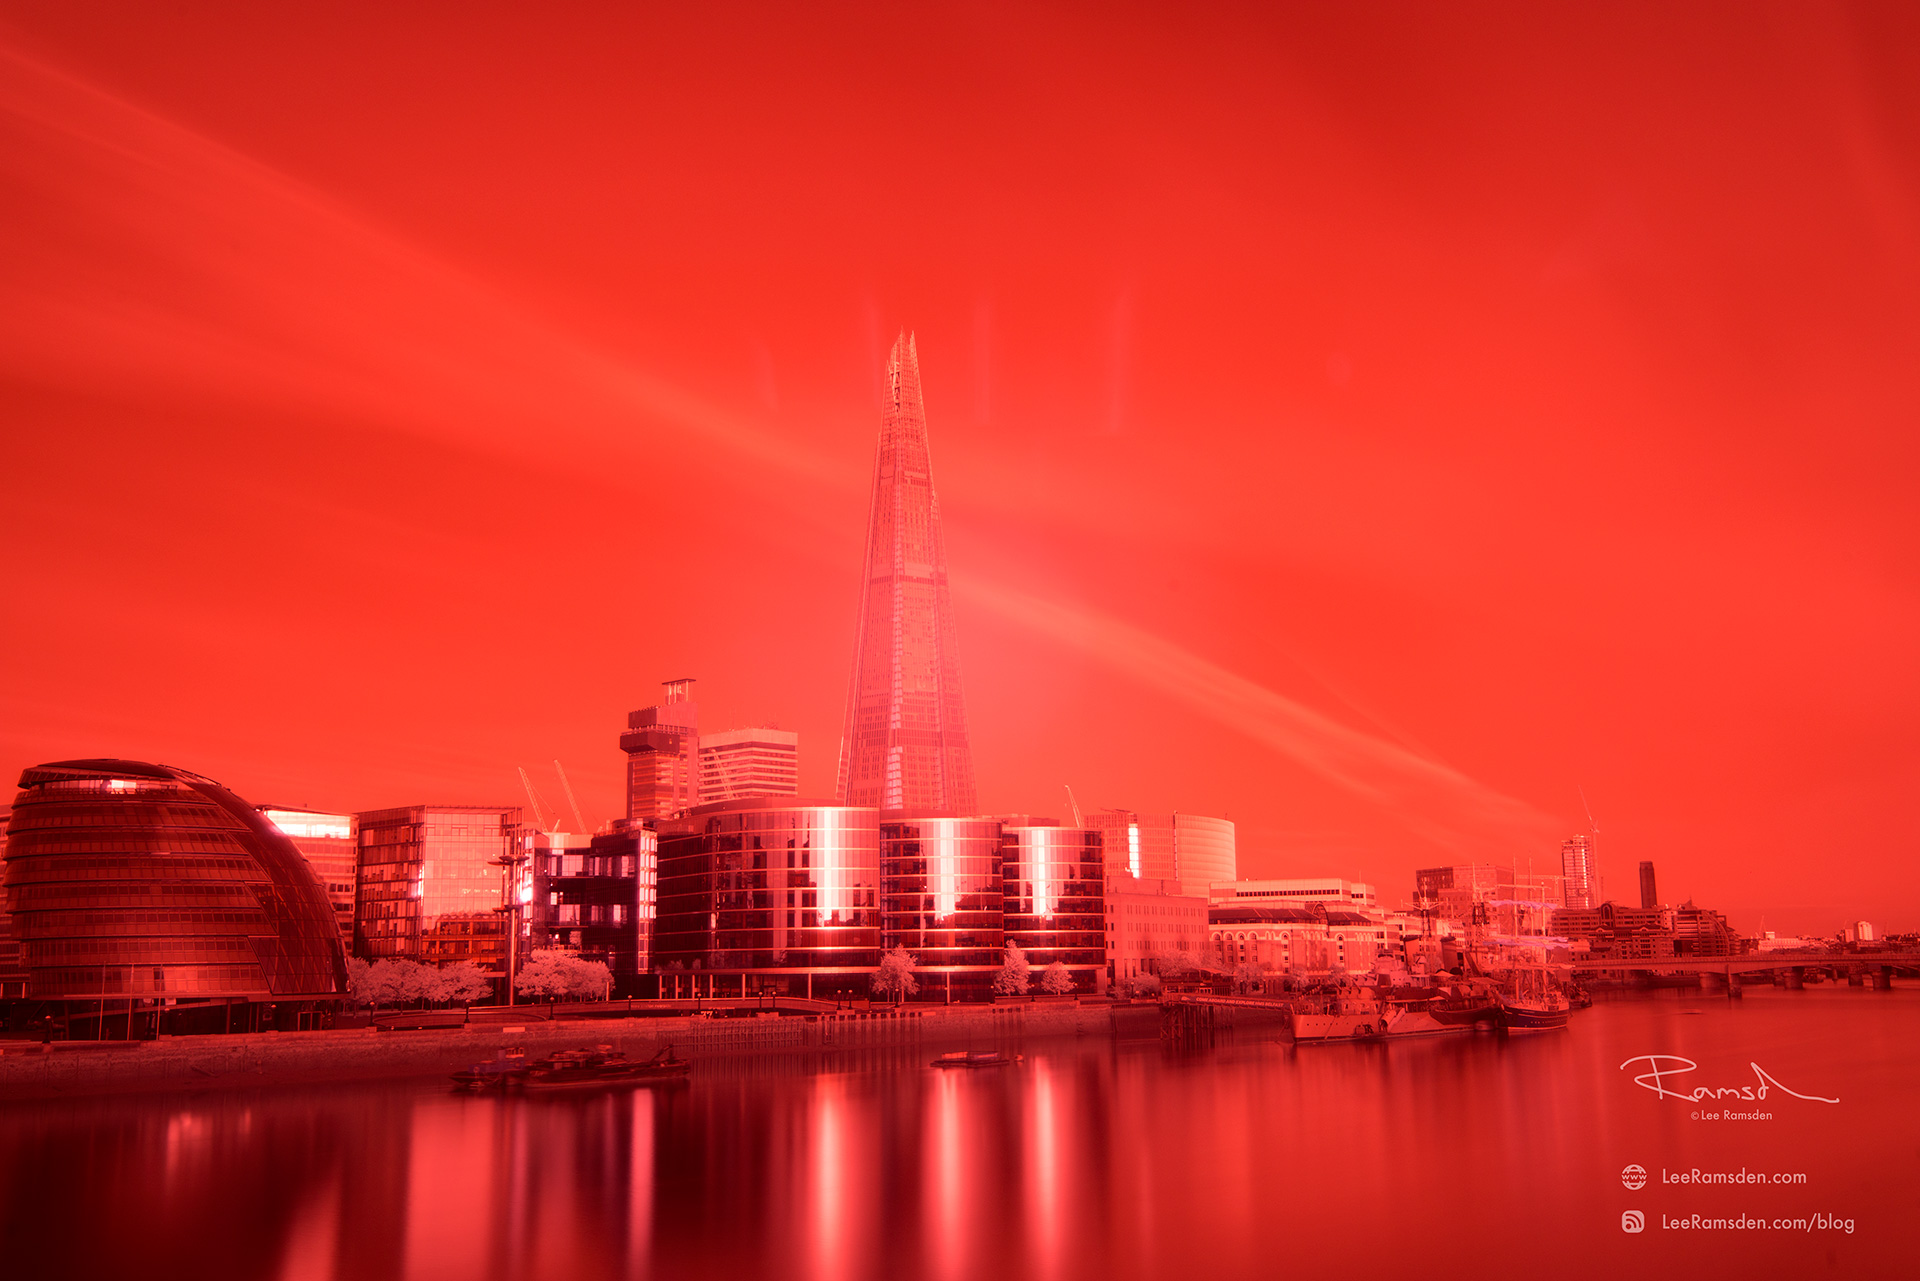
Have a look at the two images. The top image is the conventional mechanical shutter. And the lower is the electronic. I found it really interesting how the shutters create different images. 


Thanks

Fuji X-T1 Electronic shutter causing mishaped movement long exposures

View from Blackpool Tower.

01 Blackpool FC football ground Bloomfield road Tangerine army Lancashire Photograph by Lee Ramsden

Blackpool football club Bloomfield road.

Hi following on from my last post. I thought i would share some images taken from the top of Blackpool tower. 

02 The big one roller coaster Pleasure Beach Blackpool Lancashire Fylde Merlin Photograph by Lee Ramsden

Pleasure beach. 

03 Blackpool Winter Gardens Theatre 97 Church St FY1 1HL Lancashire photograph by Lee Ramsden

Winter Gardens Theatre.

04 Blackpool Funny Girls burlesque cabaret showbar North Shore Lancashire The Pink Leisure Basil Newby photograph by Lee Ramsden

Funny Girls burlesque cabaret showbar.

05 Blackpool Fylde Lancashire roof tops view from top of the Tower England abstract photography by Lee Ramsden

Roof tops.

06 Blackpool Central promenade Lancashire Ambulance service on response call photograph by Lee Ramsden

Lancashire Ambulance service.

07 Blackpool Fylde Lancashire taxi cab roof tops view from top of the Tower England abstract photography by Lee Ramsden

A towns taxi cab.

08 Blackpool Fylde Borough council Lancashire photograph by Lee Ramsden

Offices.

09 Blackpool Lytham Road Fylde B5262 Lancashire traffic roof tops view from top of the Tower England abstract photography by Lee Ramsden

Lytham road B5262.

Top of Blackpool Tower.

Blackpool Tower LED lighting dusk illuminations prom lights Landscape photographer Lee Ramsden

Have you ever wondered,  - how do they maintain the iconic lights on Blackpool Tower?

02 Wesley Berry Wez top of Blackpool Tower changing the light bulbs IRATA rope access photography by Lee Ramsden

Well meet Wez Berry, the lighting engineer that looks after the famous Blackpool Tower and regularly abseils 518 ft down the iconic landmark, to ensure its computer-operated 225,000 LED bulbs are in working order.

03 Wesley Berry service lift to the top of Blackpool Tower changing the light bulbs IRATA rope access photography by Lee Ramsden

The day starts early to catch the lift to the top. 

04 Wesley Berry Wez Blackpool Tower Lift changing the light bulbs IRATA rope access photography by Lee Ramsden
05 Blackpool Tower Lift View photography by Lee Ramsden
06 Wez Berry at the top of Blackpool Tower Lancashire photography by Lee Ramsden

Wez's workplace has a view like no other. 

“You're your own boss up here, You can crack on and do your own work.”

The location is extremely weather dependent, with extreme winds and rain meaning it simply isn't safe to scale the Tower's dizzy heights. 

“If the weather's nice, we're on, and I'll work through weekends and bank holidays,” 

“The wind really does restrict us and you have to look at the forecast very carefully."

“You've got to come into work safe and go home safe – it's very much safety first and I always have a rope access supervisor in case anything happens to me up there."

"We work closely with CJIS-LTD who provide the highly trained rope access supervisors who manage the working at height, utilising IRATA techniques"

07 Wesley Berry Wez top of Blackpool Tower changing the light bulbs IRATA rope access photography by Lee Ramsden
08 Wesley Berry Wez top of Blackpool Tower changing the light bulbs IRATA rope access photography by Lee Ramsden
09 Wesley Berry Wez top of Blackpool Tower changing the light bulbs IRATA rope access photography by Lee Ramsden

Wez -"we're working off 100 metre ropes. It doesn't scare me because whether its 20 feet or 500 feet there's no messing about and you've got to give it the same respect.”

Even when the lighting engineer is at home, he can see the Tower from his back window and he'll often get a call from work mates asking him to check on the lights.

“Plus everyone round here knows what I do, they love to criticise and tell me if they see a light out,”.

10 Highest Light fitting in Lancshire Fylde Borough council Lee Ramsden LED illuminations

The tallest light fitting in Lancashire. 

11 Wesley Berry Wez top of Blackpool Tower changing the light bulbs IRATA rope access photography by Lee Ramsden

The top is a mecca for tourists, who flock to the terrifying glass floor known as the SkyWalk. Often, they will catch a glimpse of Wez hanging underneath.

13 Wesley Berry Wez top of Blackpool Tower changing the light bulbs IRATA rope access photography by Lee Ramsden

To illustrate just how high todays worksite was. 

For more information on how to conduct working at height safely please use the contacts page. 

If you are or interested in becoming a rope access technician or require additional training i can recommend this training venue Based in Blackpool. 


Thanks

Lee

Photography tool - image stitching.

11 SKN electrical office front Aberdeen oil and gas industry

Good morning, i hope that you are well. 

Today i'd like to share a quick thought on how you can use image stitching to over come problems.

I appreciate that this is nothing new, but with some fore-thought it can become a powerful tool in your arsenal. 

I was commissioned to shoot an office building. The front had no access due to very limited space and parked cars in my way. Even with the lens at 24mm it was simply impossible to fit the building into frame. So stitching is the only way forward. 

The above image was created with around 25 images. 

Here you can see the images used, 

the camera was mounted on a tripod and i systematically panned left to right making sure to over lap alot. The building took 3 passes.

Always best to have more frames than needed, than have pieces missing down the line. 

With each up date of Photoshop CC i have noticed that it is becoming much better at stitching. 

In the past it would have not been able to do this, and for these cases i use Autopano Giga 3.0 stitching software, but photoshop managed ok with this. 

Now by using a tilt shift lens, and/or a parallax tripod head, your job in post will be so much easier, but as i do not own either of these i had to make do. The majority of my time was spent straightening the stitched image. 

As with all panos, shoot in manual, turn white balance off auto so all the images remain consistent. 

I hope that this helps, and when you are trying to shoot a subject larger than your frame, that you remember this technique. 


Thanks


Lee

Scene lighting technique.

Nikon D800 f7.1 1/8th ISO100

Good morning, 

Id like to share with you a lighting technique that you can use to light a scene, even when working on your own. 

The above image consists of 21 images, all shot and lit by myself, and i am even in the image, to add some interest. 

I will show you, how i take multiple images, all lit with off camera flash, and then the process i take in photoshop.


02 Off camera flash wireless trigger pocket wizard boom illuminating the scene

Here you can see me using an off camera flash head on a pole, with the trigger in my right hand firing off the flash and camera shutter remotely. 

Click on image to enlarge.

The final image is composed of 21 frames. 

The camera was mounted on a tripod. White balance taken off auto, manual settings, and with me using back button focusing on the camera, i know when i press the remote, the camera will not try and focus, making all the images consistent. 

05 Start image quick tip on how to flash light

Quick tip, 

Like when making panos, my first image is a large image of me, so i can find the set easily in bridge. 

Also this is a great way to make sure that the flash and camera shutter both fire correctly. 

As when using pocket wizards as the remote, the flash PW has to be set to a channel higher and some times i forget this, and so it is always a good idea to test everything before getting started and walking far into the scene. 

04 adobe bridge using photoshop tools loading layers

Using bridge i select all the images that i want to use, and from here you can easily load them into photoshop as a single document with 21 layers. 

06 using lighten blend mode in photoshop CC

Now turn off all layers, and starting from the bottom layer i work my way up through the stack, turning on, one layer at a time, changing the blend mode to Lighten. 

07 using a mask in photoshop CC

With the blend mode on lighten, the flash light will show. 

Also you will see indicated in this image the hot spot of the flash is in the image. This is easy to mask out. Also i remain in the image by some strange artefacts, just simply mask these out. 

After some cleaning and tweaking here is the before and after image.

The before being unlit. 

It is a subtle difference, but one i find takes your images to that next level. 

If you have any questions, feel free to comment and i hope to help. 


Thanks

Lee

Talisman Auk north sea oil rig - part 2.

02 Talisman AUK sea bird north oil gas rig workers rotation exploration drilling platform Aberdeen

Fuji film X-T1 f4 1/180 ISO400


Morning, 

Following last weeks post, i thought id share a couple more images from my time on the Talisman AUK oil and gas rig in the north sea. 

01 North sea oil gas rig industry tigers workers contractor Aberdeen rates of pay union redundency construction decommission drilling oil price low high

Fuji film X-T1 f8 1/180 ISO200

Drilling rig in the distance.

03 Turbine hall north sea oil gas rig platform

Fuji film X-T1 f10 1/80 ISO1000

04 SKN electrical professional contractor north sea oil gas rig compex ex inspection construction installation IRATA rope access member

Fuji film X-T1 f2 1/80 ISO1000

Electrical inspection of the fire and gas system.

05 SKN electrical contractor installing fire and gas system Talisman Auk platform

Fuji film X-T1 f2 1/80 ISO1000

06 SKN electrical north sea Stuart Naismith

Fuji film X-T1 f2.8 1/125 ISO1250

07 SKN electrical Azerbaijan Gordon Hossack contractor ex compex inspector

Fuji film X-T1 f3.2 1/30 ISO1250

08 Talisman Auk emergency phone north sea number 2222 life boats max POB

Fuji film X-T1 f2.8 1/125 ISO1250

If you have enjoyed these oil and gas industry images,

Please feel free to share these posts on your social media, giving credit to the photographer Lee Ramsden @ www.leeramsden.com


Many Thanks

Talisman 40 year old north sea oil rig - Auk

The Auk Oilfield is situated 249 kilometres (155 mi) east, southeast of Aberdeen, Scotland. It was operated by Shell UK in 50% partnership with ESSO until October 2006 when it was bought by Talisman Energy, and is now licensed by Talisman Energy. It was discovered in October 1970 in a water depth of 182 metres.

13 Talisman Auk north sea oil and gas platform plans drawing

Drawing courtesy of google images

Production started in December 1975 from the Auk 'A' platform. This platform is a steel, 8 legged jacket designed by Shell Oil and constructed at Methyl Fife Scotland. This jacket weighs 3,414 tonnes and support a topside weight of around 8,000 tonnes.

14 Aberdeen airport Bristow Departures

Fuji film X-T1  f3.2 1/125 ISO200

Helicopter Departures.

15 Aberdeen offshore oil and gas Helicopter taxi for the industry

Fuji film X-T1  f5.6 1/125 ISO200

Our transport to the platform, ready for action. 

17 Hot Work Spark potential permit to work ISSOW Draggar gas monitor meter

Fuji film X-T1  f2.8 1/125 ISO800

For me to be able to take picture offshore, it is well controlled. Permit to work, and gas tests are required. 

18 Talisman Auk platform flare on the pipe deck north sea oil price equal rotation down man redundancies

Fuji film X-T1  f3.2 1/60 ISO800

Flaring off excess gas. 

19 offshore north sea oil and gas workers working hard at the computer in the office

Fuji film X-T1  f3.6 1/60 ISO800

Our office, where the magic happens. 

20 IRATA industrial rope access techniques being used to work at height safely

Fuji film X-T1  f2.8 1/60 ISO800

Technician climbing to his work front. We use IRATA - industrial rope access techniques and procedures to work at height safely. 

21 SKN electrical abseiler working at height IRATA

Fuji film X-T1  f1.6 1/60 ISO800

SKN electrical technician.

22 Electrical worker repairing a light fitting on an oil rig offshore in the north sea

Fuji film X-T1  f1.6 1/80 ISO800

Electrical inspections being carried out. 

23 Oil and gas workforce on a tea break smoking drinking coffee

Fuji film X-T1  f4 1/60 ISO800

After all that climbing, a cup of tea is required. 

24 Auk Oil rig platform Talisman TV lounge workers watching tv

Fuji film X-T1  f2.8 1/60 ISO800

Off shift movie time. 

25 Auk oil gas rig room and shower

Fuji film X-T1  f2.8 1/60 ISO1250

40 year old ensuite rooms. 

26 Talisman Auk gas rig accommodation room bunk bed north sea oil rig price

Fuji film X-T1  f3.2 1/60 ISO1250

Bunks fit for a king.


A fact which i found funny - The field is named after the Auk a family of sea birds. There is a legend that it was to be called A UK, as the first British oilfield, until somebody realised that the sixth field would be called F UK and Shell's policy was rapidly changed to name their fields after sea birds. Shells sixth UK oilfield is called Fulmar.


Please feel free to share this post on your social media, giving credit to the photographer Lee Ramsden www.leeramsden.com


Thanks


Working in the oil and gas industry - Travel.

01 Waiting for the train that is never on time at train station with my north face luggage

Fuji film X-T1  f8 1/80 ISO200

Morning, 

I thought that it has been awhile since i have brought this blog offshore with me, and so today i am posting some pictures of the largest part of working away... The travel. 

Next week's post is from the North sea oil platform. 

I hope that you enjoy.

02 train has arrived at the station blackpool south lytham st annes

Fuji film X-T1  f4.5 1/80 ISO200

Train one of four.

03 female train ticket conductor collecting tickets

Fuji film X-T1  f3.2 1/125 ISO400

My largest company expense is travel.

Each year the prices go up, and the service goes down....

04 girl with her luggage at preston train station

Fuji film X-T1  f8 1/60 ISO200

Train two pulling into the station. 

05 train arriving at the platform Edinburgh Haymarket

Fuji film X-T1  f9 1/30 ISO200

Train number three

06 man with luggage walking along train station platform at Edinburgh waverley

Fuji film X-T1  f18 1/15 ISO200

Unknown back packers. All aboard train four. 

07 rail bridge man on the train in the shaddows Scotish scotrail

Fuji film X-T1  f9 1/30 ISO200

Crossing the forth rail bridge. 

08 lee ramsden wedding photographer editing professional photo while on the train

Fuji film X-T1  f7.1 1/125 ISO200

Trying to use my time productively and edit some wedding images. 

09 Aberdeen train station people elighting from a ScotRail train

Fuji film X-T1  f4 1/125 ISO320

Arrived Aberdeen station. 

10 Aberdeen Jet bus Airport city center cheaper than a taxi

Fuji film X-T1  f4.5 1/125 ISO320

Aberdeen has the most expensive taxis in all of Europe. Where you can use the Jet bus, it is cheaper. 

11 View from primier inn Aberdeen airport window airoplane close to the runway

Fuji film X-T1  f3.2 1/125 ISO800

They said that the hotel is close to the airport.... they are not wrong. 

12 Aberdeen premier inn room double bed with no Lenny Henry

Fuji film X-T1  f3.2 1/60 ISO500

Finally - 8 hours later, 4 trains and a bus i can get some sleep. 

And to be honest this is an easy journey. I spent 4 years where i had a train, 5 hours international flight, taxi and then a boat to get to the platform. 

13 Talisman Auk north sea oil and gas platform

Image courtesy google images

Please check next weeks post where i will display some images taken from the above platform.


Please feel free to share this post on your social media, giving credit to the photographer Lee Ramsden www.leeramsden.com


Thanks  

Animated Gif - Cinemagraph

Canary Wharf London UK animated gif animation time lapse

Morning, 

I was recently having a play with some Cinemagraphs, Where a still image has some motion.

This post was an experiment on how they will display on this blog. 

As a reference for myself this is a 3.4MB file 1200x774px.


This video is a time-lapse that was shot of Canary Wharf, I think the technique is pretty cool and will shoot some footage to have a play with this again. 


Thanks


Lee 

Infrared black and white processing.

Morning, i thought id share a couple of images taken at the local using the infrared filter.

Above are two images, one was taken normally and processed to black and white, where as the other is an infrared image then processed to black and white. 

As you can see there is quite a difference. The infrared image was shot at a longer exposure and so the water will obviously look quite different but i do like what happens with the foliage. 

02 infrared leaves city park hoya r72 filter

Nikon D800 70-200@200mm f3.5 1/80th ISO5000

Leaves high in a tree. I liked how the light was illuminating a small section. This again is a processed infrared image. This is a noisy file due to the high ISO used. I was trying to gain a fast shutter speed to eliminate any motion from the wind blowing the leaves. 

04 infrared lake city park hoya r72 filter

Nikon D800  70-200@70mm f8 13th ISO800

I have noticed that along with the Sky, water goes blue also. 


Thanks


Infrared Tree.

Good morning, 

Attached is an image taken using an infrared filter. 

Now with taking a few of these i am slowly learning what to expect. 

So far i am liking images of trees against a sky background. The sky looks fairly normal and foliage looks interesting. I have learnt that if there is no sky and you fill the frame with only foliage the results are not that pleasing. I even had a play with a couple of portraits and skin looks awful. 

Infrared tree city park hoya r72 filter Potters bar Oakmere park

Nikon D800  70-200@75mm f5.6  6th ISO100

I hope that you enjoy these images and my thoughts and learning as i progress using this technique.


Thanks

Infrared lens hotspot.

Good morning. 

If you have purchased the infrared filter as i previously mentioned in a blog post couple of weeks ago, and have been shooting with it, you will have noticed the strange colouring that you have received. 

The bright red file is normal, Prior to shooting setting a custom white balance is recommended. A lot of advice i have read is setting it again green grass or foliage. For the below image being a city scape there wasn't much grass around, so i chose to shoot in RAW and play with the white balance later in post. 

One thing i have learn is the visible hot spot in the centre of the image. I shot this using Nikons 24-70mm f2.8 and lens hot spots are a most common problem encountered when shooting infrared light. They usually manifest in the form of a bright circle, sometimes in the shape of aperture leaves directly in the center of the image. The problem is exaggerated as you stop down (increase f stop number), with the spot becoming more prominent and defined. 

Hot spots can be caused for a variety of reasons, the most common of which is the coating on the inside of the lens barrel being reflective in IR light. Another frequent reason is light interaction between the coatings of the lens elements. A less common reason is light interaction between the lens elements and the imaging sensor(usually the micro-lenses) in the camera. In this case using the lens on one camera model may have no hot spot issues and on another model there could be prominent hot spots.

Unfortunately, if your lens has this issue the only solution is to simply use a different lens altogether. Fortunately the majority of lenses don’t have this problem or the problem is very minor and normally not visible in images.

Once i find a suitable lens and am happy with the results ill report back. 

If you have any suggestions to use on a Nikon body id like to hear your views. Feel free to use the contact page.

I hope that you enjoy these images. This is a new technique and something i am enjoying playing with. 


Thanks

Infrared Black and White. London

<img src="Black and white morelondon" alt="lack and white monochrome morelondon infrared hoya R72 filter The Shard vewing gallery town hall Lee Ramsden">

Nikon D800 f8 3min ISO400 24-70mm@28mm


Morning, 

Here is a Black and White processed infrared image of London's MoreLondon area, with the town hall and the Shard building. 

My next blog post on Monday i will be showing the out of camera file compared to the processed colour version. And explain why there is a visible hotspot in the centre, due to the choice of Lens. (This won't happen again, i am enjoying the learning curve with these.)


Thanks

London early morning.

<img src="morelondon" alt="The Shard greater London city ong exposure Lee Ramsden river Thames">

Nikon D800 f14 60sec ISO100 24-70mm@28mm

Good morning, 

An images taken from Tower bridge at 04:35hrs. I shot this purposefully knowing that the sun will rise behind me. Some times shooting towards the sun isn't always the best option. I wanted to illuminate the buildings and not cast them into silhouette. As the sun raised it lit up the buildings perfectly just as i wanted. 

This concludes the two weeks of colour London images. 

I hope that you have enjoyed my colour London photos as i have sharing them with you. 

Next week starts 10 days of Black and white images of London. 


Please feel free to share this post on your social media, giving credit to the photographer Lee Ramsden www.leeramsden.com


Thanks